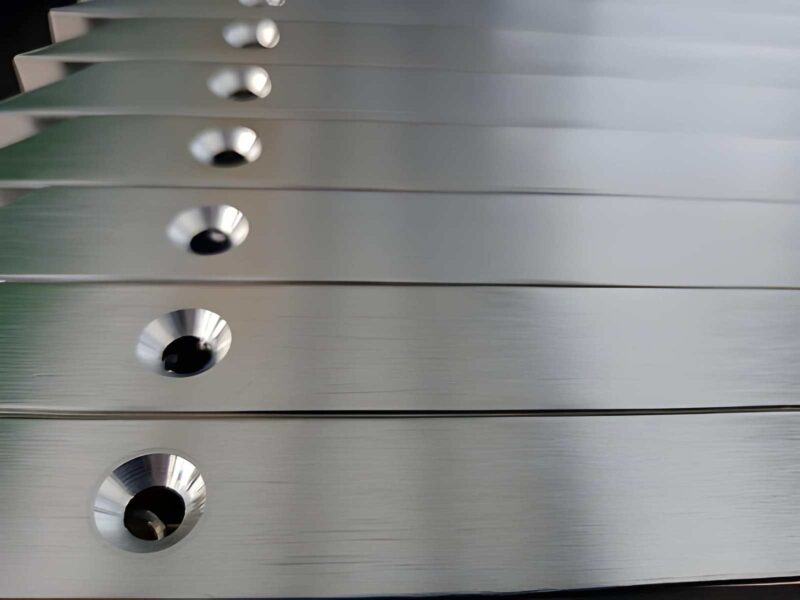
CNC Knurling is a pattern machining technique used to create textured designs on metal surfaces. Manufacturers employ it to improve the grip on parts like handles, knobs, and shafts. Depending on the design requirements, the pattern typically takes a diamond and straight form. It serves both functional and aesthetic purposes in many applications. Knurling is a central process in industries like automotive, aerospace, and machinery. It maximizes the usability, tool performance, and machine components. Moreover, its ability to improve grip plays a key role in safety and precision. The texture also helps to prevent slipping and ensures better control during use. In this article, we will discuss the knurling, its process, types, and benefits it brings to manufacturing industries.
Different Knurling Tools for Knurled Finish
Let’s talk about the common tools for obtaining a knurled finish;
Knurling Wheels
Knurling wheels have tractive patterns. For example, once they rotate diamond or straight lines are imprinted on the material service. These wheels are generally applied for precision tasks which produce repeatable patterns and superior friction. These are most suitable for round stock materials such as shafts, rods, and pins.
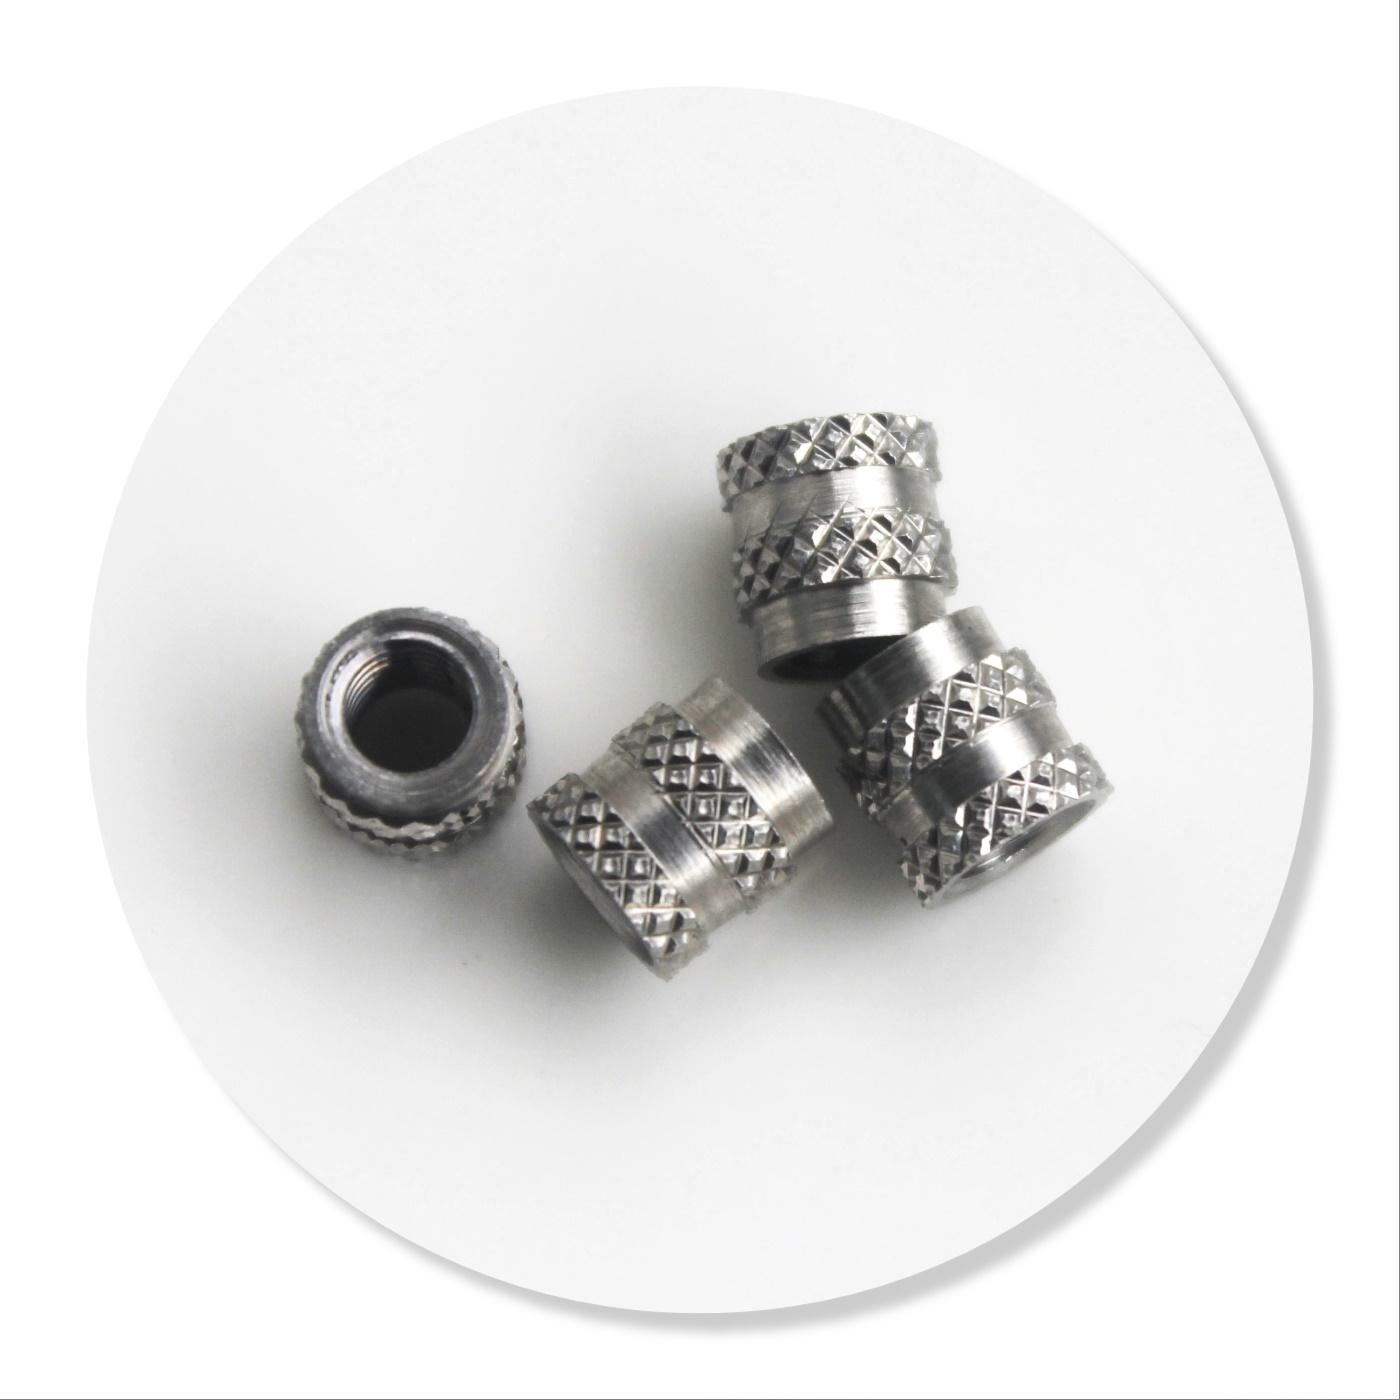
Knurling Inserts
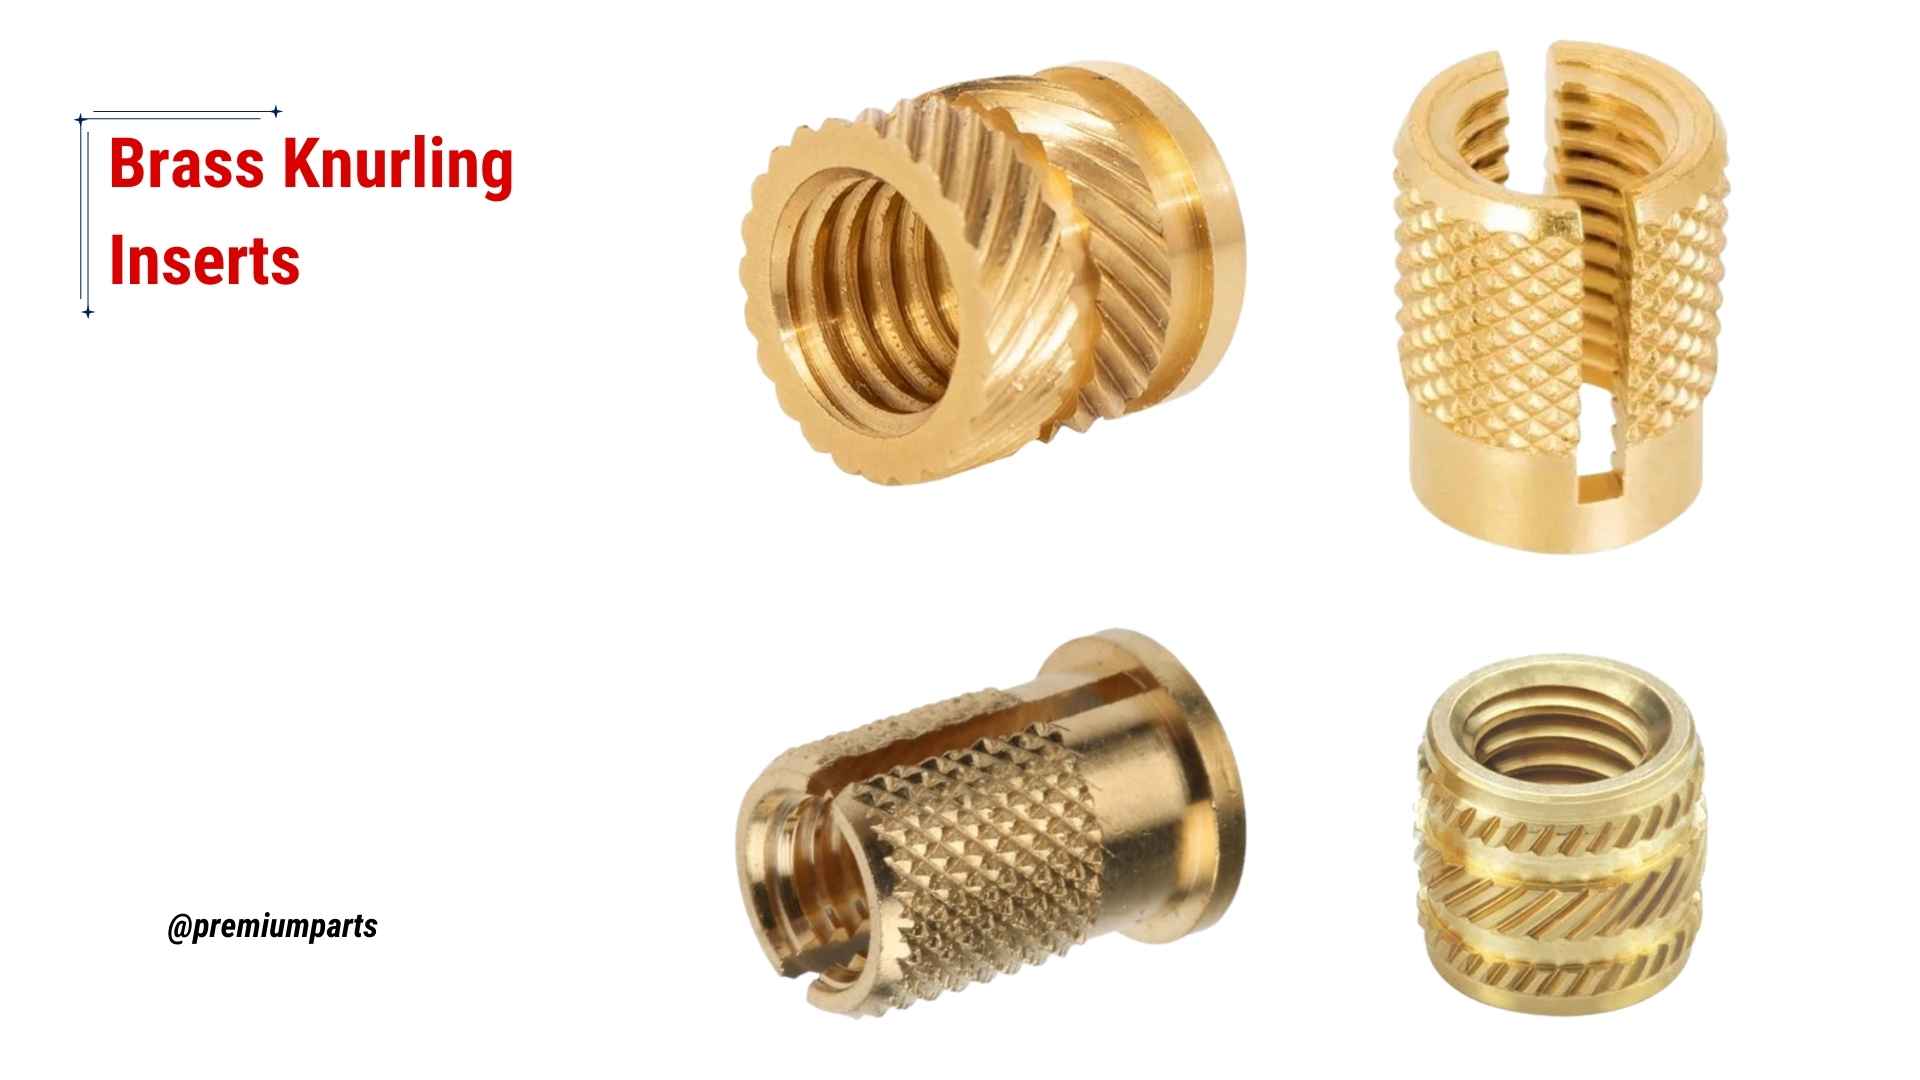
Brass Knurling Inserts
Image Description: The image features a set of brass knurled inserts arranged neatly against a neutral background. Each insert displays a distinct, detailed knurling pattern across its surface.
Knurling inserts are sometimes regarded as cutting inserts used in tool holders and can be replaced easily. These inserts come in a specific design such as straight, diamond, or cross. Engineers use inserts in machines that need frequent changes in pattern, and where the tool has undergone wear and tear.
Knurling Dies
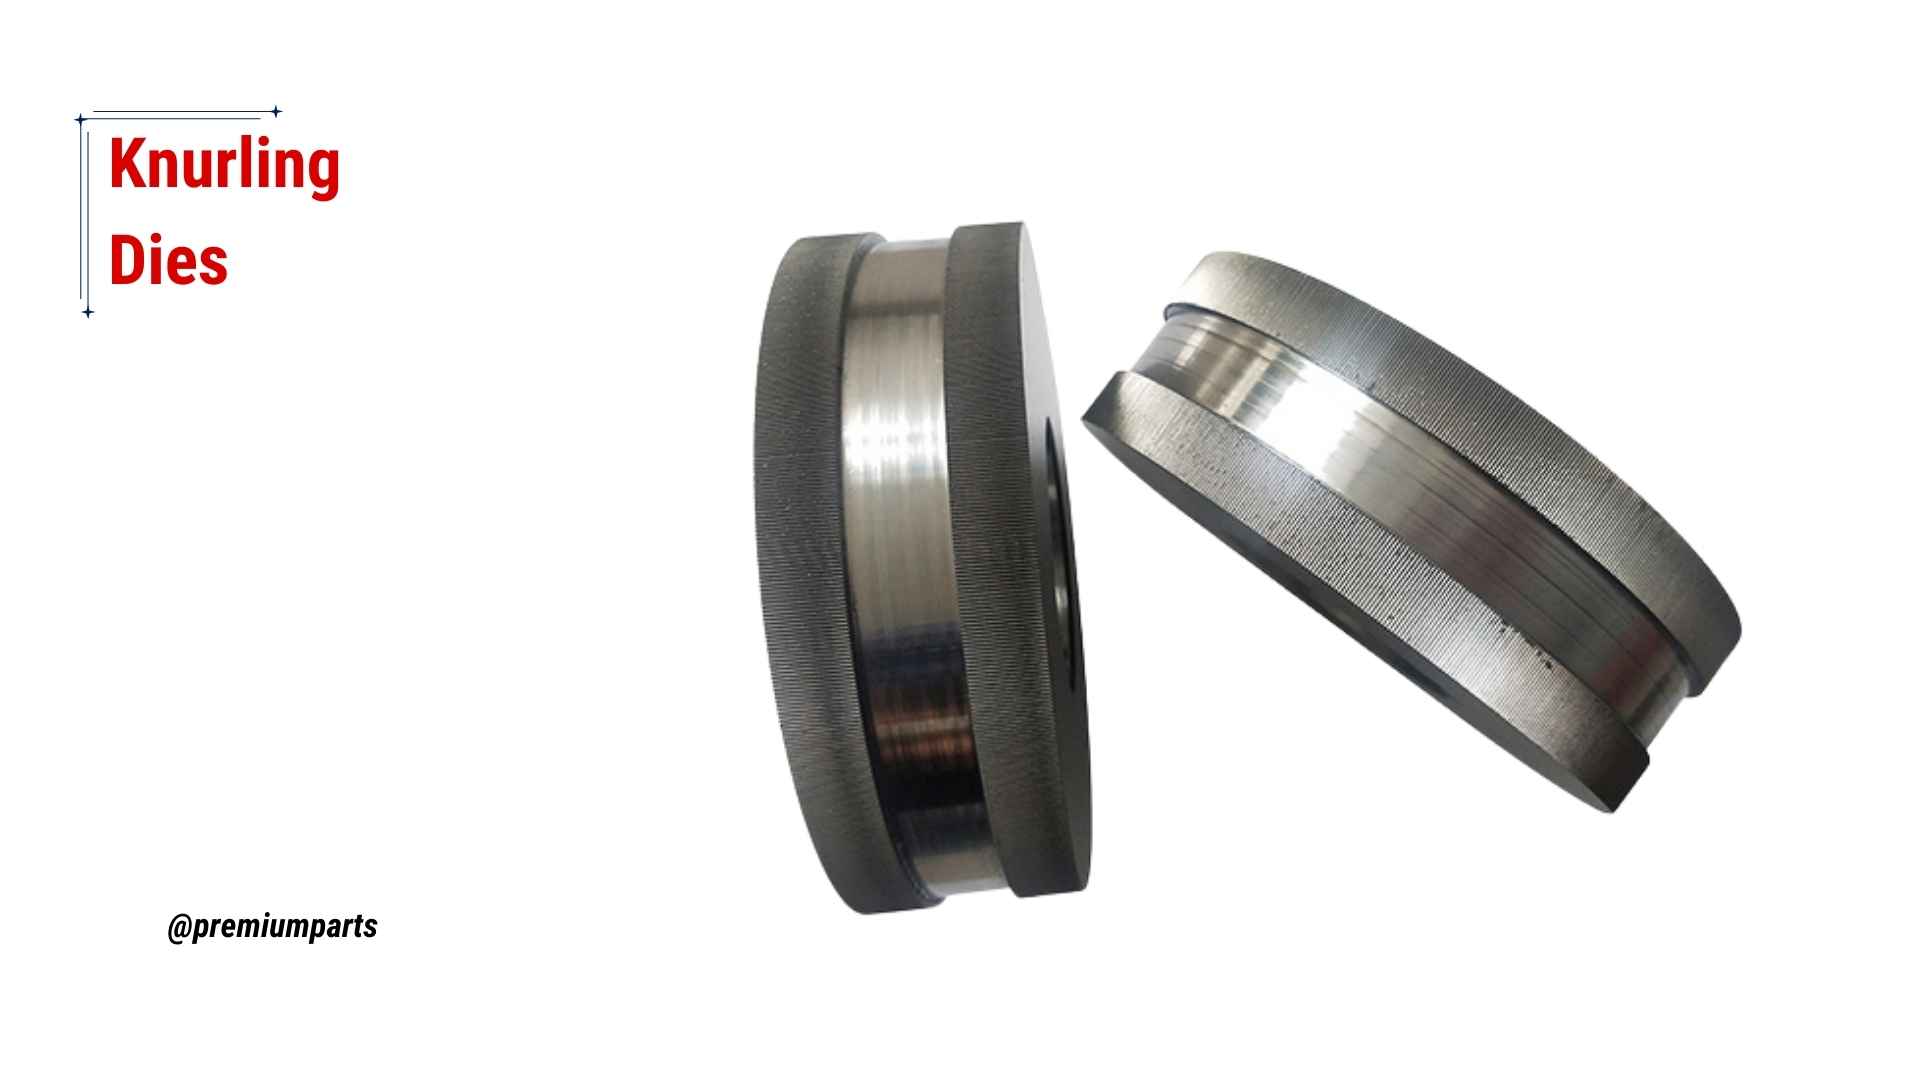
Knurling Dies
Image Description: The image shows a set of knurling dies made of high-strength metal. These dies are cylindrical and designed to create textured patterns, like crosshatch, and diamond shapes, on materials.
Large knurling dies are high-intensity tools. You can apply these dies on large or complex part forms. They work by pressing the material between two dies to create an impression.
Cylinder dies are usually employed in large-volume production of parts where deep knurling patterns are desired. They are well suited for the knurling of parts like machine tool members, valve bodies, or any large round sectioned component.
Push-Type Knurling Tools
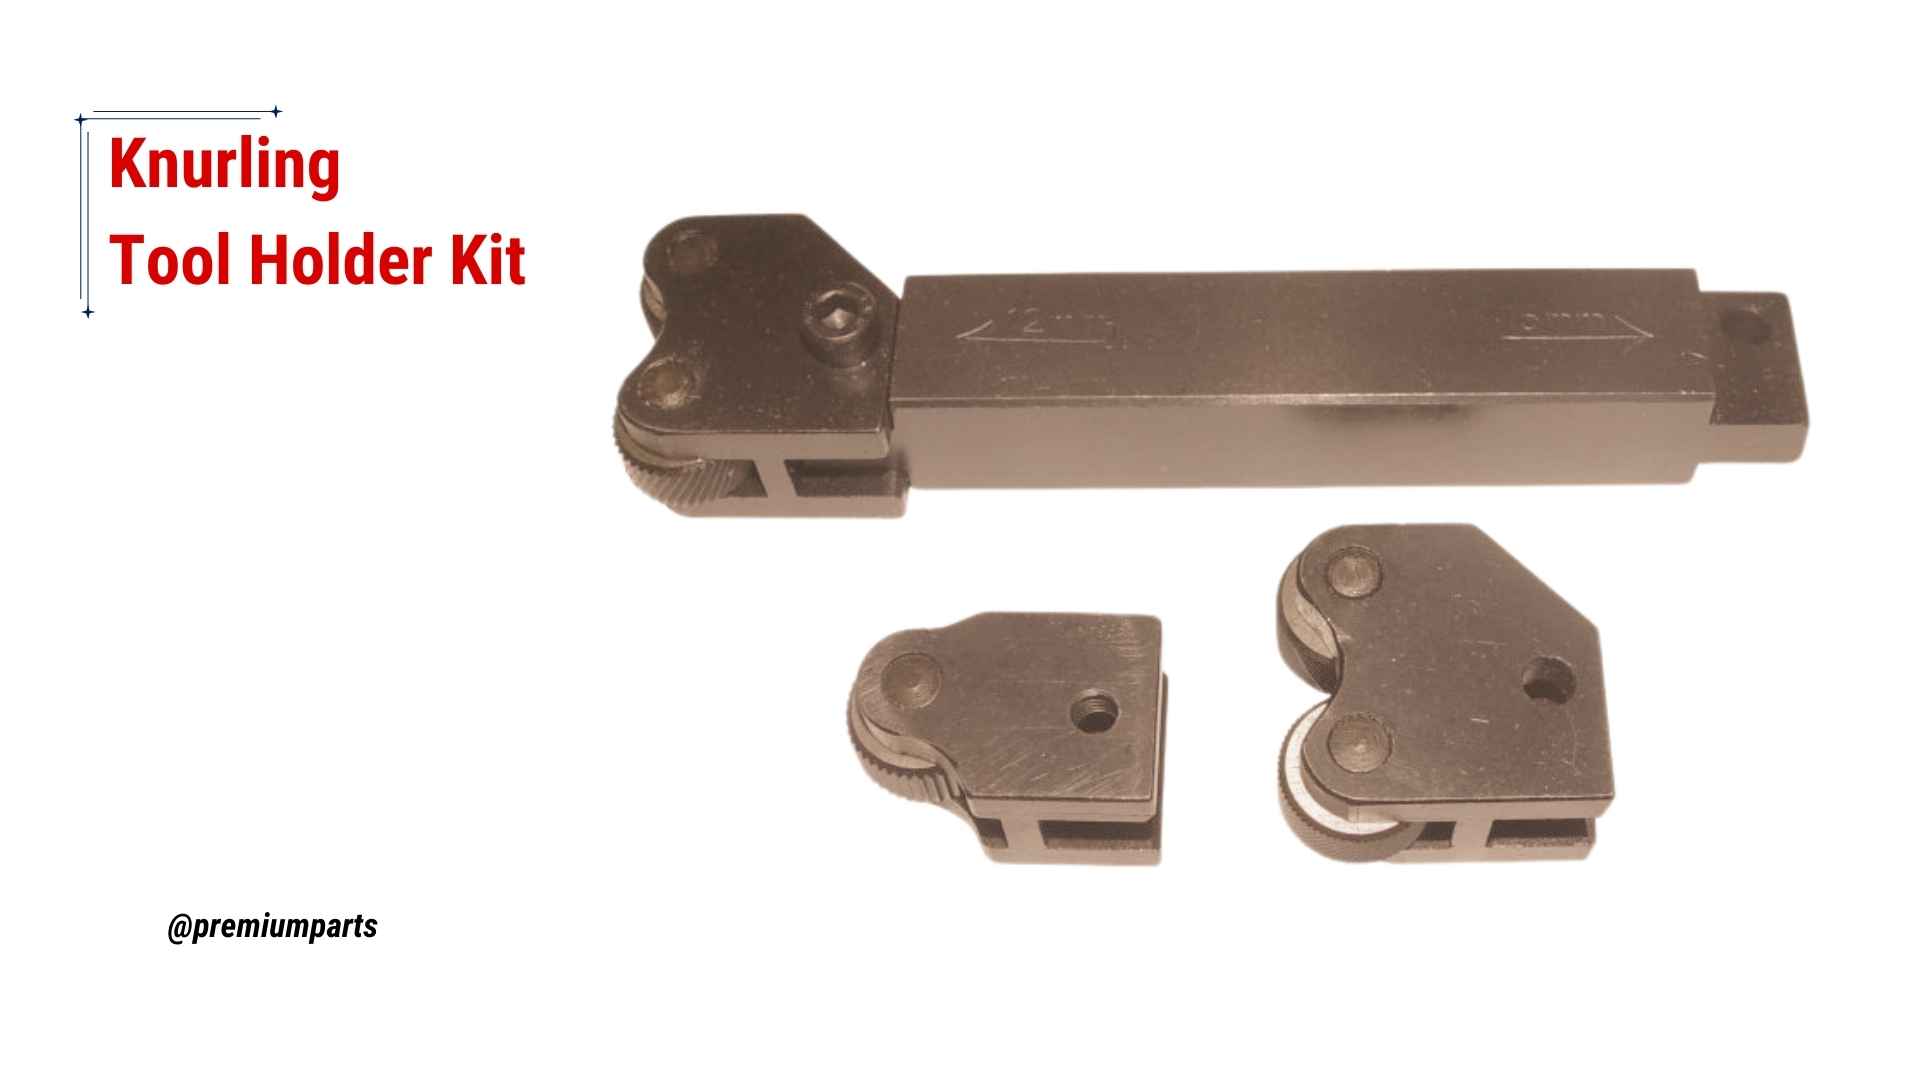
Knurling Tool Holder Kit
Image Descriptions: The image showcases a knurling tool holder kit. It features a set of tool holders designed to securely hold interchangeable knurling wheels. The holders are made of durable metal, with finely machined surfaces.
Push-type knurling tools are meant to be placed directly on the workpiece. Different from classical rotary engraving techniques which merely rotate, these tools are cut into the material to generate the pattern.
Push-type knurling tools are well-suited for soft materials that do not require deep indentations and for short runs. They are typically applied to knurl short shafts, small parts, or when a low-profile work surface is needed.
Floating Knurling Tools
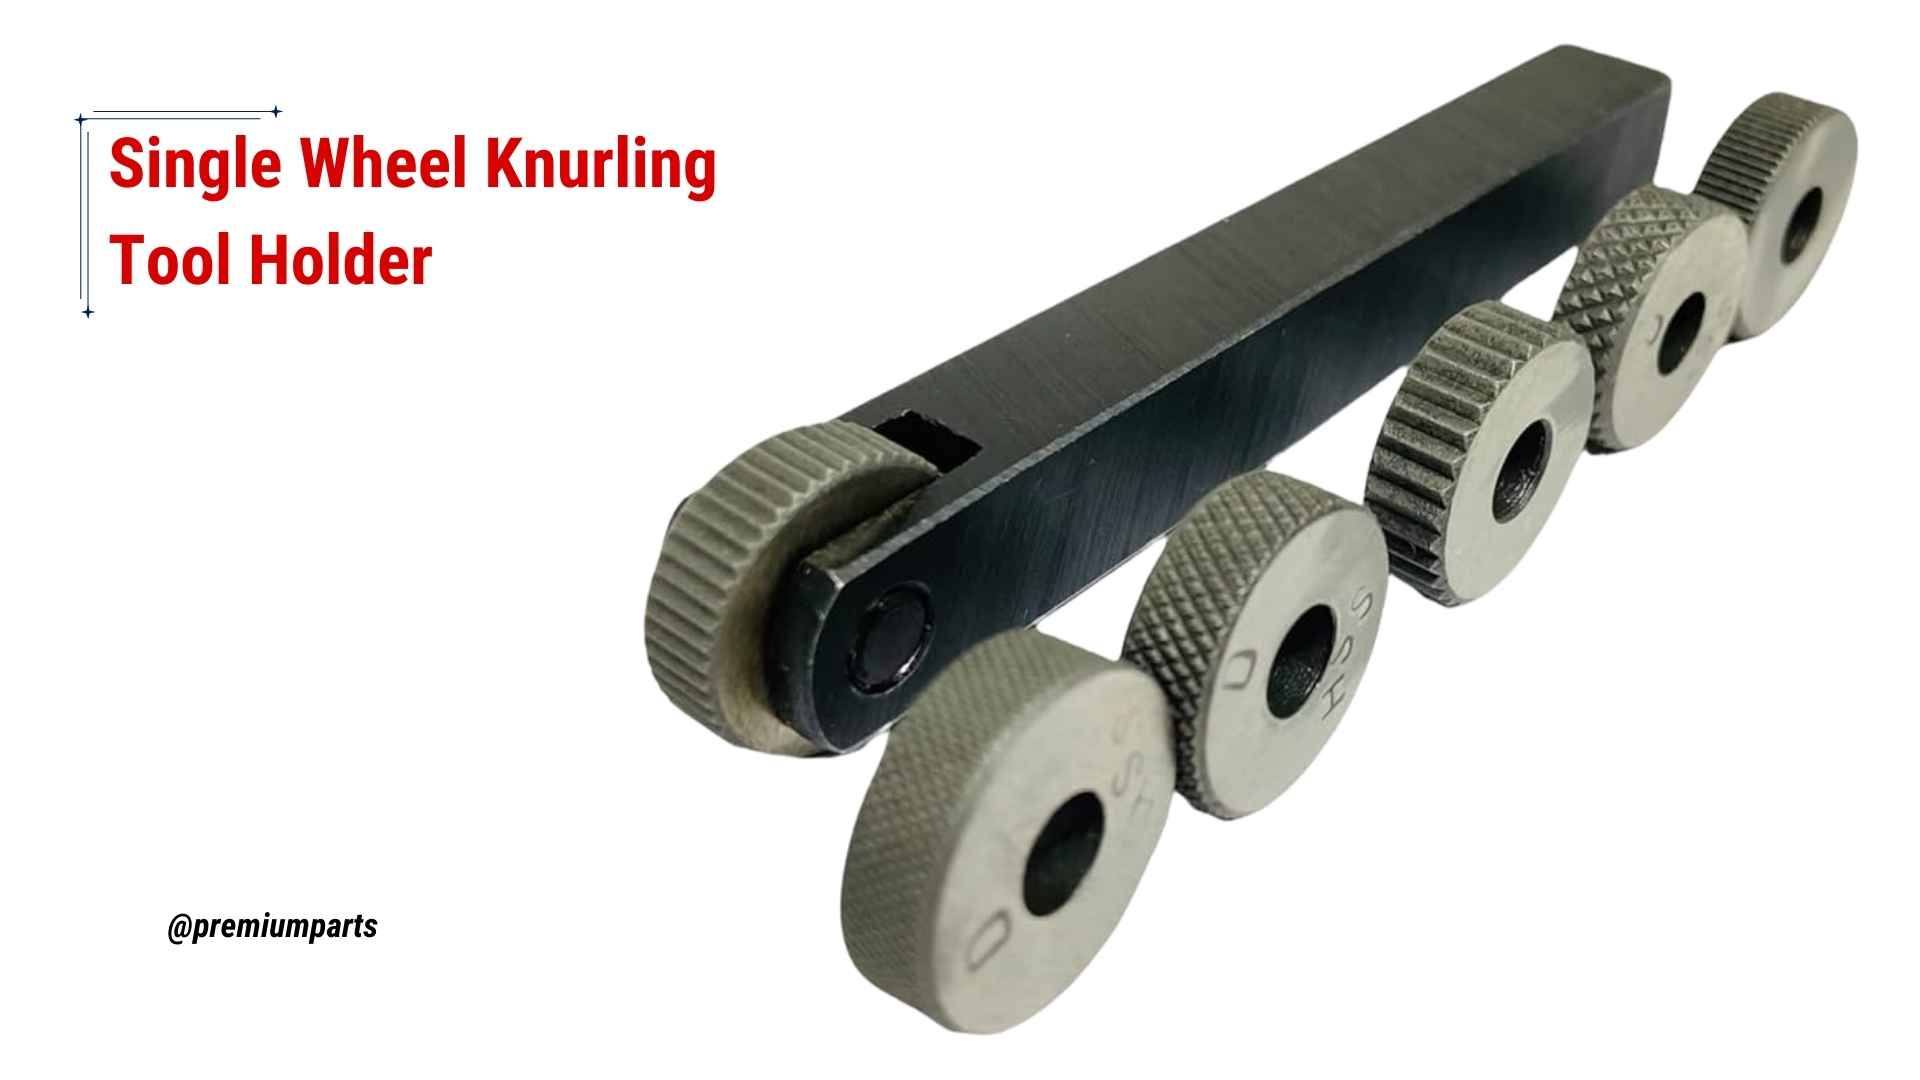
Single Wheel Knurling Tool Holder
Image Description: The image depicts a single-wheel knurling tool holder. It is designed to hold one knurling wheel securely.
Floating tools are designed to allow for angular misalignment between the workpiece and the knurling tool. These are fitted on a floating holder that can move during the operation to maintain the correct texturing orientation even if the position changes slightly.
Climbing knurling tools are most effective when the workpiece cannot be perfectly aligned and have slightly different diameters. They are employed in CNC machining and procedures to guarantee uniformity in the knurling of many components.
How Does the Knurling Process Work?
Here are the process steps of knurling below.
Knurling Tool and Material Setup
The knurling process begins by choosing the right tool and then fixing the material properly. Select the tool by considering the desired pattern either – diamond, straight, or circular. The material is then firmly held in position by clamps to the lathe or a machine, as the case may be. The secure alignment is imperative since it allows the tool can indent the correct pattern on the surface.
Applying the Knurling Tool
Once you set up the machine, precisely rotate the tool to press it against the material, to form desired pattern. This tool is translated along the surface that forms grooves or raised sections. The pattern becomes more discernible as the tool advances making successive passes on the surface.
Control The Pressure and Depth
In the knurling process, you must carefully control the pressure and depth. Excessive force can often lead to either tool or material damage or both while the low force inadequately embeds or creates a shallow/uneven pattern. You need to apply moderate pressure but control the depth since the tool penetrates the material. The careful considerations make the texture of the product uniform and give it the needed grip or feel as required.
Inspecting the Finished Knurl
Make sure, the pattern depth is consistent and lines up parallel to one another. Moreover, check for inconsistencies, defects, and sharpness, and, make changes if these happen. Due to the requirements of both functions and aesthetics, the part surface must possess a uniform and level plane.
Finalizing the Part
After completing the process, it’s crucial to inspect the workpiece. You can check for consistency in the pattern depth and alignment. If you find any defects and uneven areas present, make the adjustments.
Types of Knurling Techniques
Let’s talk about the types of knurling techniques;
Straight Knurling
Straight Knurling Wheels
Image Description: The image shows a set of straight knurling wheels, each featuring a series of parallel, sharp ridges along the circumference.
Straight knurling is used in cutting parallel lines on the surface of a material. The technique is efficient for parts that require simple texture. It offers a moderate friction advantage which makes it ideal for small-scale use. Manufacturers often straight knurl shafts, handles, and machine parts where gripping doesn’t need to be too firm.
Benefits of Straight Knurling
Straight knurling provides neat and simple outcomes. It is easy to achieve with minimal tool changes. Moreover, it is relatively economical and effective for simple applications. The textured surface created is not overly abrasive; making it ideal for parts that undergo moderate frictional forces.
Process Steps
- Secure the part on a lathe or machine.
- Choose a straight knurling tool and place it over the surface in the direction in which you want to make knurls.
- Apply pressure, and twist it to make parallel.
- Change depth to get the uniform thickness of the skin surface.
- Inspect the outcomes for quality and pattern uniformity.
Diamond Knurling
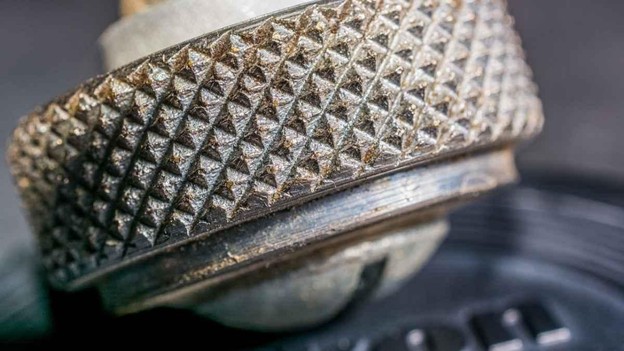
Diamond Knurled Pattern
Image Description: The image features a close-up of a diamond-knurled pattern, where intersecting diagonal lines form a sharp, diamond-shaped texture on a metal surface
Diamond knurling interconnects diagonal lines forming patterns like rectangular figures of diamonds on the surface. The technique is most frequently used to increase the surface coefficient of friction. You can employ it where high tensile strength is needed; for instance; in tool handles and knobs. The diamond configuration is highly effective for anti-slip and offers good control during operation.
Benefits of Diamond Knurling
Diamond knurling gives better surface grip and control. The crisscross layout is even more pronounced than the straight knurling pattern which makes them a better fit in high traction applications. Moreover, it turns out to be much harder and less likely to wear out; optimum for heavily used parts.
Process Steps
- Secure the part in the machine and position it correctly.
- Select a diamond-pattern knurling tool and position it properly.
- Apply pressure to press the tool into the surface.
- Let the tool shave the diamond pattern as the material turns.
- Look at the evenness of the diamond shapes and the depth.
Circular Knurling
Circular Knurling
Image Description: The image shows a circular knurling pattern. Concentric rings are evenly spaced along the metal surface. The grooves are smooth and precise.
Circular knurling leaves concentric circles around the part circumference. Though mostly found in car interiors; it has decorative use and offers a little traction. The technique most applies to external knurls when aesthetics are critical in applications like knobs, handles, and many other consumer goods. There is medium gripping ability with circular knurling. However, its firmness is not as optimal as the diamond and straight knurling.
Benefits of Circular Knurling
circular knurling adds beauty to the shape of the part. It has a fair amount of grip and is therefore ideal for general use. The rings are smooth and this eliminates the chances of wearing out the material. This is not as engaging as other approaches but it still minimizes slippage in several practices.
How Does It Work?
- Secure the workpiece firmly to the lathe machine.
- Select a circular knurling tool and place it against the bush.
- Work gently while pressing the tool and turning it to form circles with ridges.
- Monitor the tool to ensure even ring formation.
Tips for Achieving the Best Knurled Finish:
For optimal knurled finish; follow the below guidelines.
Proper Tool Selection
Be very careful about choosing the etching tool for the right material and the desired pattern. It’s advisable to use the correct tool to create standard and even knurl. For instance, you can choose diamond knurling tools for a tight firm grip. While straight tools are appropriate when you’re dealing with simpler textures.
Adjust the Right Speed and Feed Rates
Align the machine speed, and feed rate as per the desired knurl pattern. Because, if the feed rate is too fast, you may not develop good patterns on the workpiece as intended. While a slow rate of feed can cause high tool wear. So, always use the settings provided in the manufacturer’s guidelines.
Apply Pressure Gradually
When starting knurling, one should use increasing pressure to avoid damaging the items. If you employ high pressure at the start, the part can lead to distortion and also form an undesirable pattern. Beginners should gently tap the material to start. Then, gradually stretch it until it reaches the preferred depth.
Make Sure The Material is well-kept.
To avoid movement and vibrations, secure your workpiece well and firmly. If the workpieces oscillate in the setup, it can be a source of inconsistent knurling patterns and surface distortion.
Monitor Tool Condition
Always check your tool in terms of wear and damage. A worn-out tool wears poor patterns and may affect the item’s finish during the molding process. Replace inserts or wheels if necessary to preserve the standard quality.
Maintain Proper Alignment
You must properly orient the tool to the workpiece. Misalignment can cause the tool to slip or produce uneven patterns. The correct alignment assists in developing appropriate and neat knurls on the workpiece.
Lubrication
Apply adequate lubrication on the working surfaces to minimize friction and heat formation during the process. Additionally, it can reduce tool wear, and material deformation, and lead to a better surface finish.
Control Knurling Depth
Be careful not to go deep while knurling or going shallow because you might extend beyond the needed depth. The uniform thickness provides the right pattern and avoids distorting the material. Make adjustments as needed to maintain uniformity.
Use the Right Material
Always choose the right materials for comfortable knurl to develop the desired outlay of your design. Soft metals like aluminum, are better knurled than hard metals such as steel. That is why harder materials will call for the use of higher-level tools and even tool modifications to attain the right result.
Common Defects of Knurling Operations:
- Uneven Knurl Pattern
- Incomplete Knurling
- Tool Wear & Tear
- Surface Distortion
- Excessive Burr Formation
- Tool Marks/Scratches
- Excessive Pressure/Force
- Tool Slippage
- Material Defects
Conclusion
Knurling is a significant machining process for optimizing grip, texture, and aesthetics. In fact, the process requires expertise and bit challenging to employ in-house. However, with a sound knowledge of the tools, and techniques, and an understanding of possible defects, you can make corrections to engraving operations. Moreover, proper machine setup, the right selection of the right tool, and the appropriate setting of the right parameters are critical parameters to consider. So, precise control over above mentioned parameters can lead to desired project results. In addition, the common issues may include poor tool condition, wrong speed and pressure, and insecure material clamping. Considering all the above factors can guarantee consistent, durable, as well as accurate knurled finishes.
FAQs
Q1. What factors affect the quality of a knurled finish?
The key factors include tool type, material hardness, pressure, speed, feed rate, and alignment. Further, proper lubrication and tool condition also significantly influence the finish quality.
Q2. How do I fix uneven knurl patterns?
Uneven patterns can result from incorrect tool alignment, inadequate pressure, or excessive tool wear. Check tool positioning, apply consistent pressure, and replace worn tools for a smooth, uniform finish.
Q3. Can you perform the knurling on hard materials?
Yes, but it requires specialized tools like carbide inserts and diamond wheels. Harder materials may need slower speeds and higher pressure to create a clean knurled finish.
Q4. What is the ideal depth for a knurling pattern?
The ideal depth depends on the application. For general use, a depth between 0.1 mm to 0.3 mm is common. Manufacturers use deeper cuts for heavy-duty applications. While shallow cuts are ample for light-duty work.