Reaming is a simple yet central process in machining. It involves enlarging previously drilled holes to achieve a precise diameter and smooth finish. You can think of it as fine-tuning a hole to fit the exact specifications you need.
The reaming process plays a key role in improving hole accuracy and surface quality, especially in precision work. Let’s get into what reaming is and why it’s so crucial in manufacturing!
Why is Reaming Important in Precision Machining?
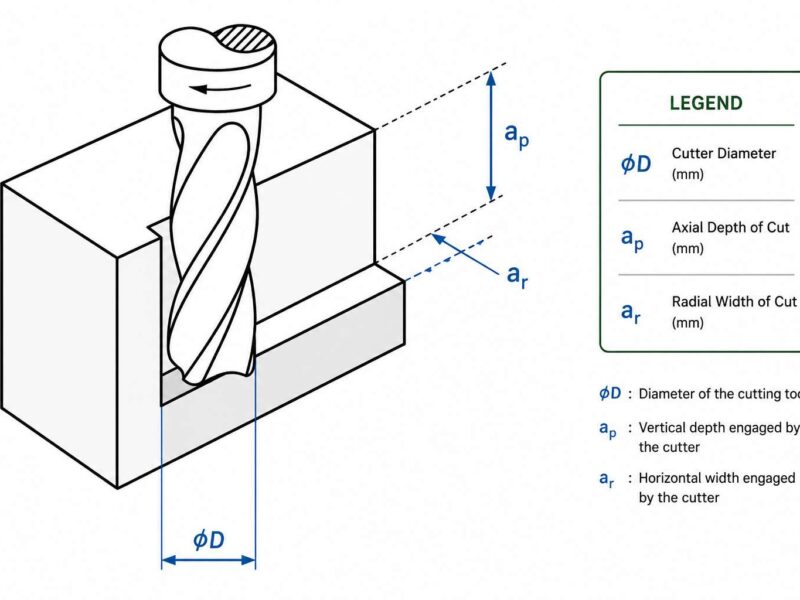
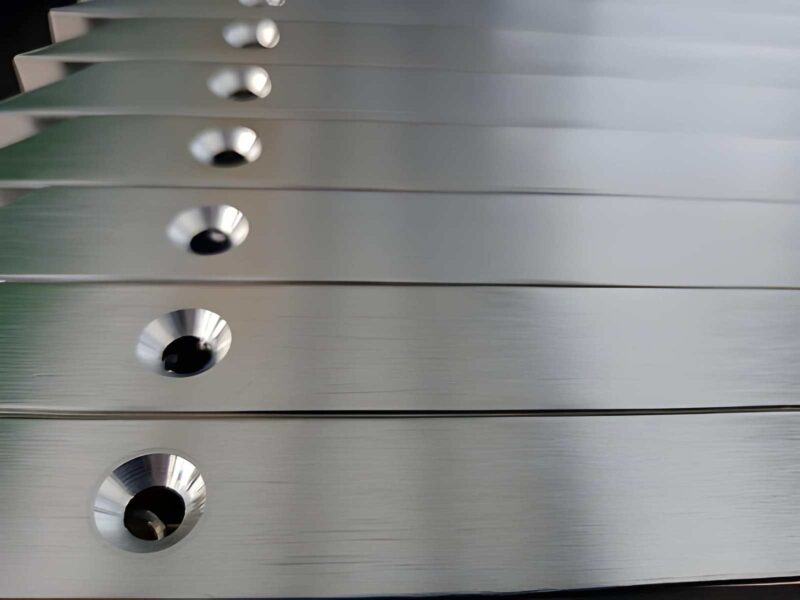
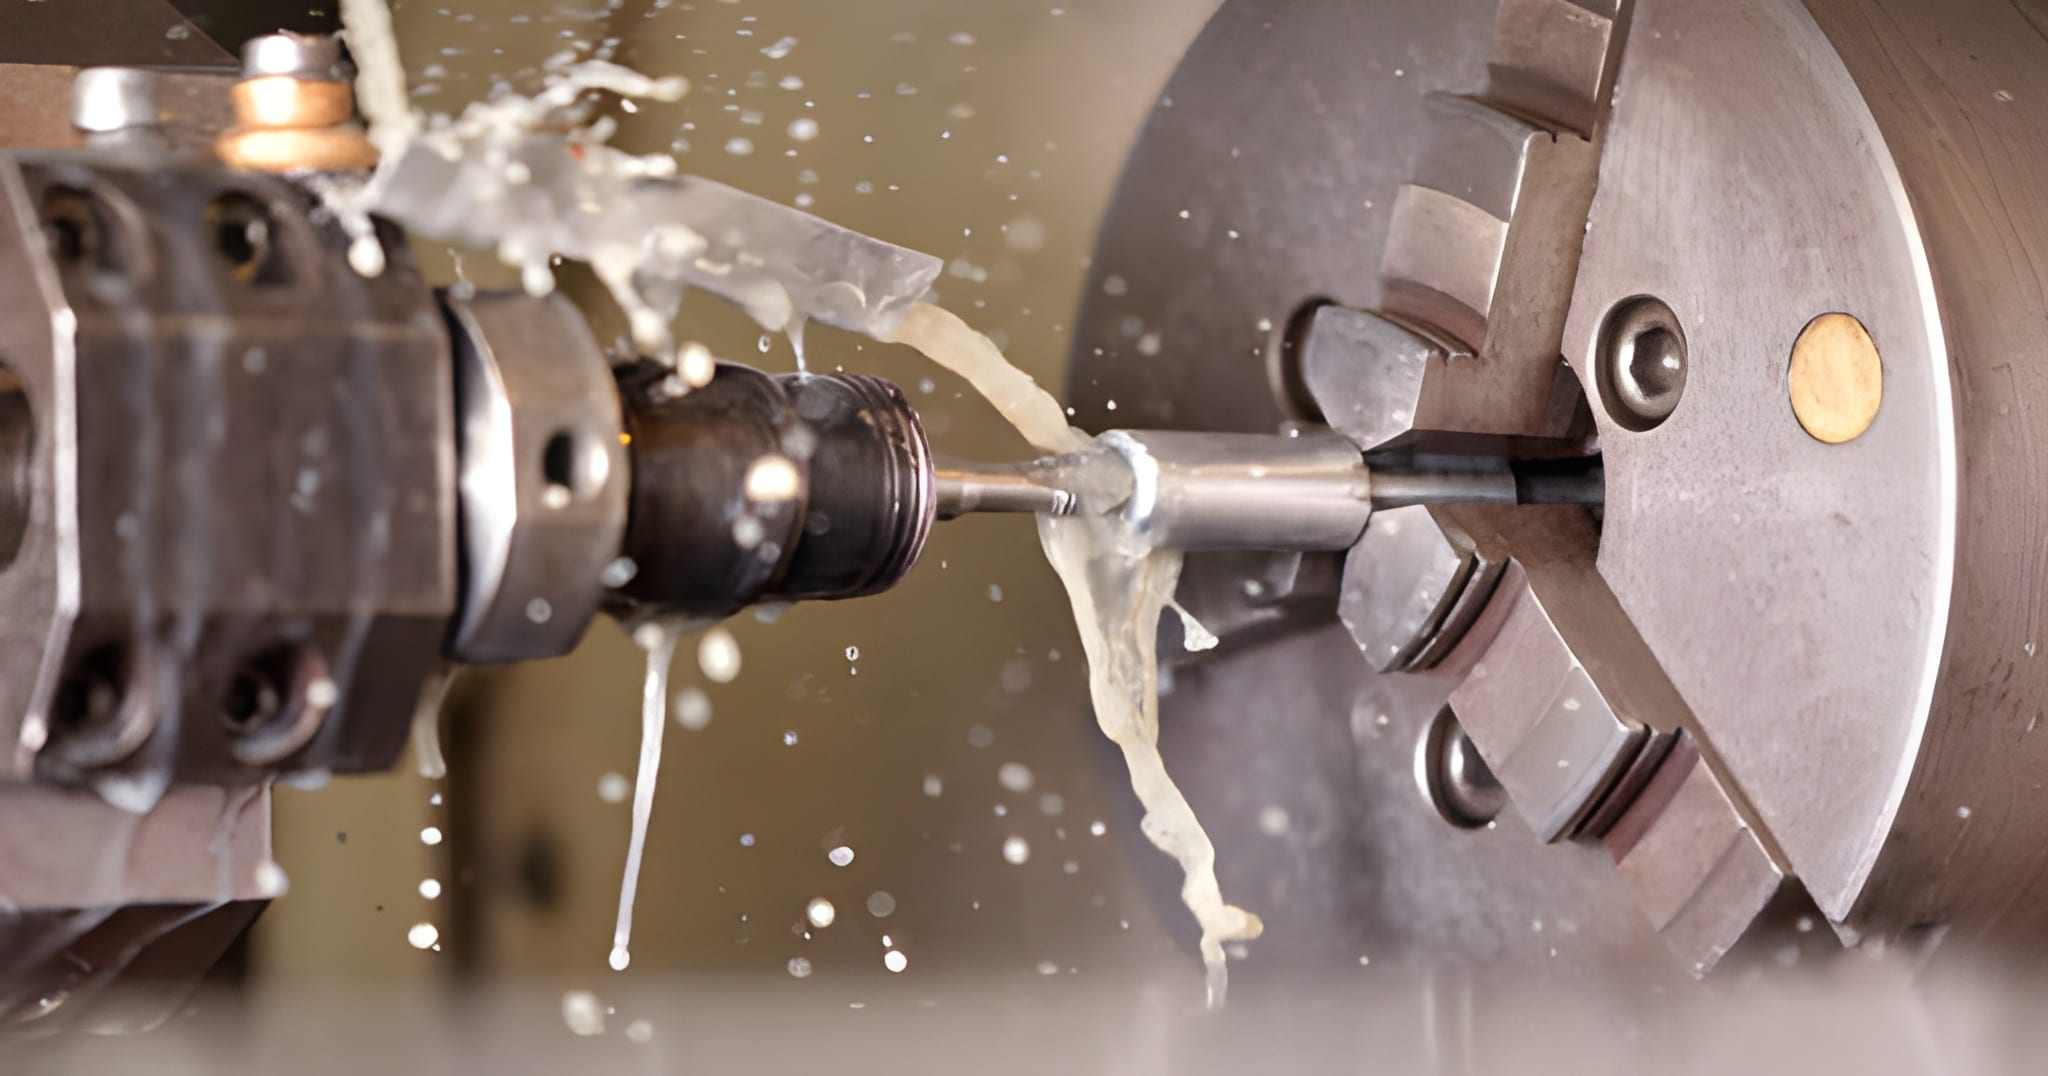 Reaming Machining
Image Description: Close-up of a reamer tool performing reaming on a metal workpiece.
Reaming is a process of enlarging a hole. Moreover, it imparts accurate dimensions and finishes to it. Primarily, it comes next to the drilling step to maximize the precision and finish of a hole.
Reaming involves a tool called a reamer. It has several cutting edges to remove a small quantity of material. So, it is possible to get closer tolerances than drilling alone.
Reaming improves the hole geometry due to the removal of rough edges. Further, it’s useful when you need to get accurate measurements and a smoother surface. In metalworking, automotive, and aerospace industries, reaming is used frequently because of the precision requirements.
Unlike drilling, which makes a hole, reaming additionally ensures that the hole is of the required specification. Additional uses of reaming are also capable of adjusting small flaws in the material that were left behind by prior drilling operations.
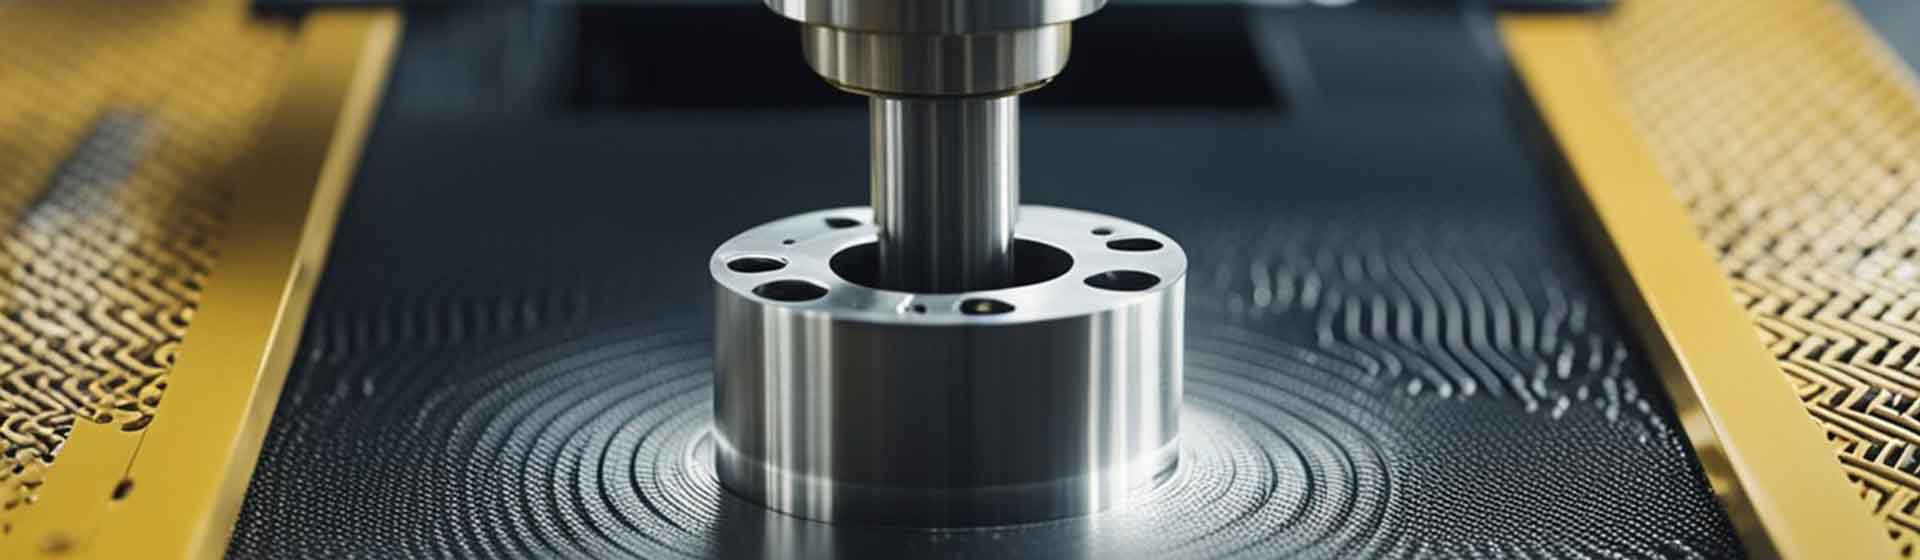
How to Ream a Hole: A Step-by-Step Procedure
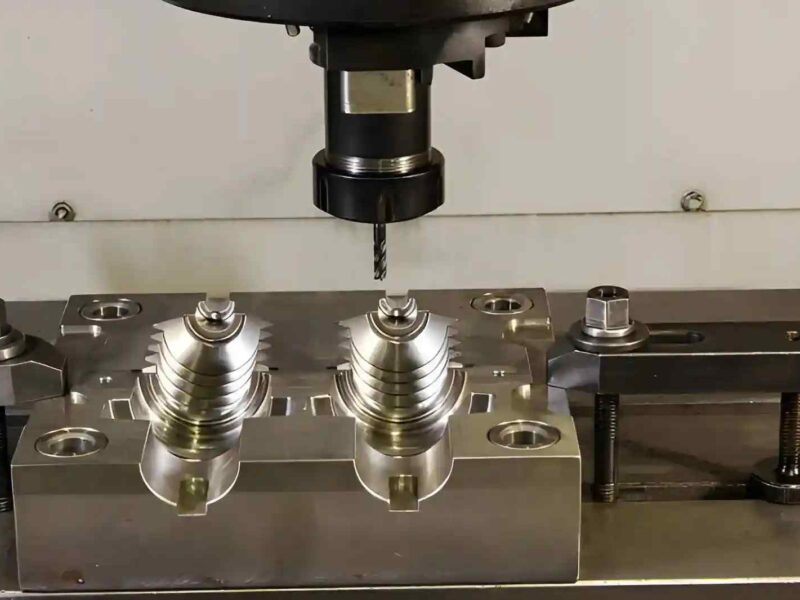
 Reaming a Hole
Image Description: Top view of a reamer enlarging and smoothing a hole in metal.
Reaming a hole is fairly simple, though with specific importance placed on creating certain size differences. Follow these simple steps to get the best outputs:
Step # 1. Choose the Right Reamer Tool
Choose a reamer according to the hole size and the material being used. For this reason, if you are using different materials and varying hole sizes, then you have to be very selective with the reamer you are picking. It’s always advisable to utilize a high-quality reamer to avoid sharp edges and get improved outcomes.
Step # 2. Secure the Workpiece Properly
Be certain to check that the workpiece is adequately fixed on your machine before initiating the process. Before starting drilling, you should preferably clamp or fix it tightly in a vice. The tightness possibly wrecks the piece during reaming, any movement at all.
Step # 3. Correct Speed and Feed Rate Should be Predetermined
Other settings that must be aligned are achievable dimensions while cutting, raising, or lowering spindle speed and feed rate. Although a slower speed proves more efficient, a constant feed rate is usually preferable for the neatest and finest finish. Take your time at this step because precision is imperative here.
Step # 4. Start Reaming with Light Pressure
When reaming, it’s optimal to start light and apply even pressure. As with carpentry, just let the reamer do the work, or turning or flattening, and don’t force it. If more pressure is required, then slowly build it up, but try to be delicate so as not to cut too deep into the material.
Step # 5. Check for Accuracy Regularly
For each pass, read the hole diameter and examine the surface finish. The frequency of measurements enables one to keep confirming the right hole size and quality. If you observe; adjustments are needed, you can make them during the operation.
Step # 6. Clean the Hole After Reaming
After reaming, the hole should be cleaned, and any bits of metal in the center of the hole should be removed. It serves to guarantee that no particle of debris will hinder the persisting endeavors. This is why, to maintain a clean hole, there could be a well-created fit of any of those parts that you may be required to pass through.
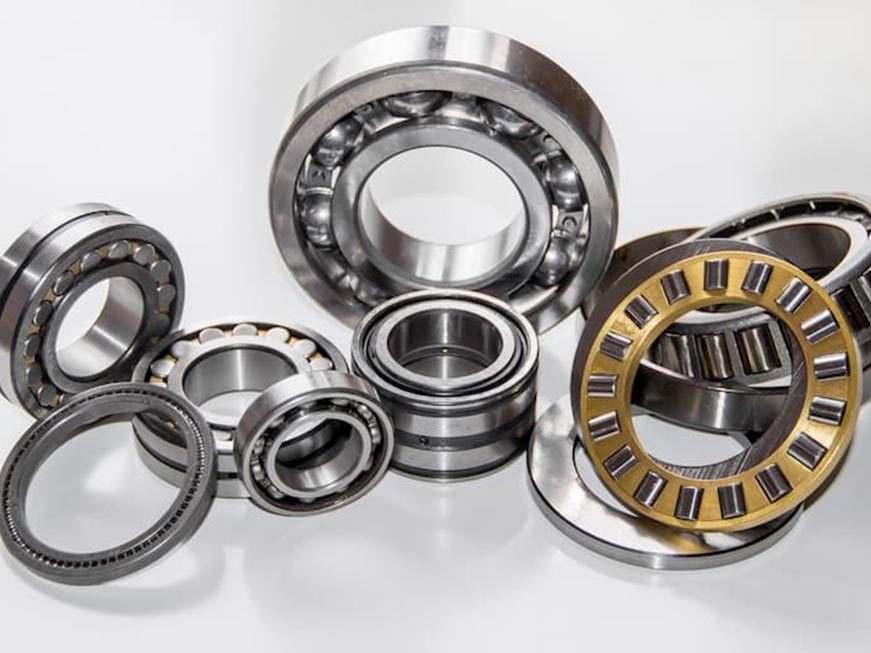
What Are The Different Types of Reamers?
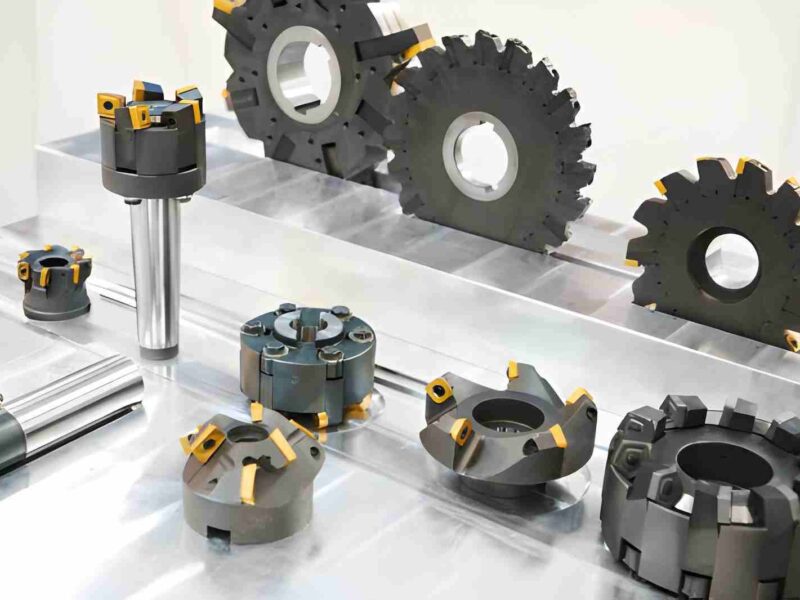
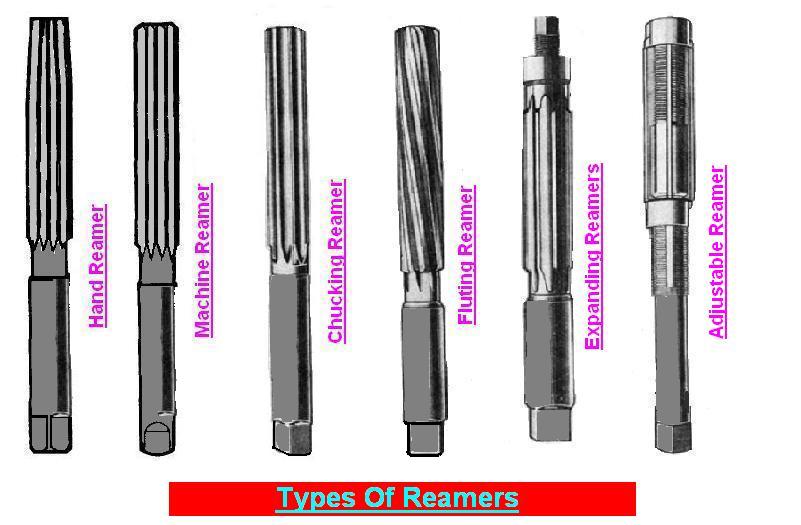 Common Reamer Types
Image Description: A collection of different reamer types displayed on a plain surface.
Reamers come in various types, each designed for specific tasks. Understanding which type to use can make a huge difference in your machining process. Let’s explore some of the most common types of reamers:
1. Straight Flute Reamers
Straight flute reamers are the most common type. Their cutting edges run parallel to the tool’s axis. These reamers work well for soft and low-carbon materials. Use them when you need a good surface finish and precision.
2. Spiral Flute Reamers
Spiral flute reamers have a helical cutting edge, which helps remove chips more efficiently. They work great for materials that tend to clog straight flutes, such as aluminum or brass. This design also helps with better chip evacuation during the reaming process.
3. Tapered Reamers
Tapered reamers are designed to expand holes gradually. These reamers are ideal where the angle required or the alignment is to be matched. They can usually be seen in aerospace or auto-engineering industries that require the assembly of narrow fits.
4. Adjustable Reamers
Adjustable reamers allow you to alter the hole diameter. These reamers are equipped with adjustable blades. So, they can either increase or reduce their size. They are best suited during situations where you want to drill several holes, albeit with different diameters all within the same operation.
5. Counterbore Reamers
Counterbore reamers are used solely for the preparation of flat-bottomed holes. They are extremely useful whenever you need to form a depression for the shank of a bolt or a washer.
6. Core Pin Reamers
Core pin reamers are often used in molding and die-casting processes. They help to remove excess material from the core pin to improve dimensional accuracy.
Common Issues that Occur During the Reaming Process
Reaming can be an efficient process; however, sometimes, issues happen. Their understanding can help you troubleshoot quickly and avoid costly mistakes. Let’s take a look at some typical challenges and how you can tackle them:
1. Poor Surface Finish
If you find that your reamed hole is rough, it may be caused by the wrong rpm/feed rate. Besides, you may be applying too much pressure and utilizing an incorrect reamer. So, here, increasing the speed and using the right reamer can make a difference in the surface’s smoothness.
2. Tool Wear and Damage
Reamers, like any other tool, wear down over time. If your reamer starts indicating the signs of dullness and chipping, then it cannot even cut properly. So, routinely inspect your tools and take replacements as often. This way, you can keep your cutting to a good standard.
3. Hole Size Inaccuracy
Inaccurate hole size is a frustrating problem when your reamed hole doesn’t match the required size. Normally, it is caused by a worn reamer, excessive feed rate, and incorrect reamer orientation.
4. Chip Build-Up
When the layer of chips is built up excessively, it potentially leads to blockage and impairs the tool’s cutting action. When the chips are not removed appropriately from the hole, they stick out. In chip evacuation, you need to pay more attention to the feed rate and the coolant involvement.
5. Material Overheating
Reaming creates heat, and so when the material reaches its peak point, it could lead to tool breakage and poor finishes. This tends to mostly result from inadequate lubrication and a lack of sufficient coolant.
6. Hole Deformation or Tapering
In the reaming process, sometimes the hole may turn slightly tapered or could be out of round. This may be caused by using excessive force, a wrongly aligned reamer, and incorrect settings on the reamer machine. So, it’s essential to always recheck with the machine well set up and always apply equal pressure when reaming.
Tips and Precautionary Takeaways for Reaming Operations
Reaming is a precision process, so a few simple tips and precautions can make all the difference. Here’s how to avoid issues and get the best results:
1. Make Sure You’re Using the Proper Reamer
Reamer selection depends on the material and hole size to be drilled and must always be selected correctly. Using the wrong tool can result in poor results, incorrect dimensions of holes, and a rough surface. Select the design of the reamer based on the requirements as intended.
2. Control Your Speeds and Feeds
Select the proper rate of feed to the material as well as to the reamer. You may over-speed on the cutting operation and find the reamer or the workpiece is already twisted or spoiled. It helps you slow down the process and get a nice, clean hole free of any burrs.
3. Keep the Workpiece Secure
Reaming should be done on a well-clamped workpiece to avoid peripheral drilling. Often, if the reamer is in use and makes even the smallest movement, it is likely to cause the holes to be offset.
4. Check the Condition Part of the Monitor Tool Frequently
You should examine the reamer before starting the operation and periodically. If your tools are blunt or rusty, you can ruin the day. Change the reamer appropriately to ensure its optimal condition to cut through the material.
5. Use Coolant or Lubrication
Lubrication is essential to reduce friction and heat buildup. It avoids heat buildup, tool blunting or breakage, and destruction of workpieces in fabrication processes. Coolants are effective for cutting and better hole quality.
6. Don’t Go for Light Passes for More Control
Do not attempt to cut out too much of the unhealthy material at one time; take thin cuts. It cuts down the incidences of the tool getting damaged as well as gives you a more polished surface.
How to Determine the Size of a Reamed Hole?
Let’s discuss how you can determine the actual hole size of a reamed hole:
1. What Specifications of the Final Hole Size Are Expected
Start by knowing the required size for the hole. The exterior dimensions of the reamed hole need to be equal to the part dimensions that will be inserted into it. It is recommended that you check any drawings or blueprints provided to obtain particulars of the finished hole size.
2. Account for Tool Tolerance
Reamers consequently possess certain allowable deviations in the hole sizes they develop. You must know that a reamer is designed to cut a small amount of material. It enlarges the hole aerodynamically after drilling. In general, it’s usual to ream with a tolerance of +0.001 inch to +0.005 inch, varying with the tool and the material.
3. Measure the Hole Before Reaming
For successful reaming, you must check the size of the hole with a micrometer or a caliper before commencing it. The pilot hole may not be as large as needed: room for the reamer to take place is left. It gives you an idea of how much material the reamer will be required to cut away from the hole.
4. Use a Chart for Reamer Sizes
Charts, which are usually offered by the reamer manufacturers, state the recommended hole sizes by the reamer diameter. These charts tell you the exact size required for a particular reamer. Make sure you consult these guidelines to avoid mistakes and to choose the right reamer for the right job.
5. Measure Again After Reaming
To reduce the audit period, you should measure the hole after the reaming process to confirm it meets the required dimensions. The final check confirms your part has achieved the right size and tolerances.
Reaming vs. Boring vs. Drilling: How These Operations Are Different?
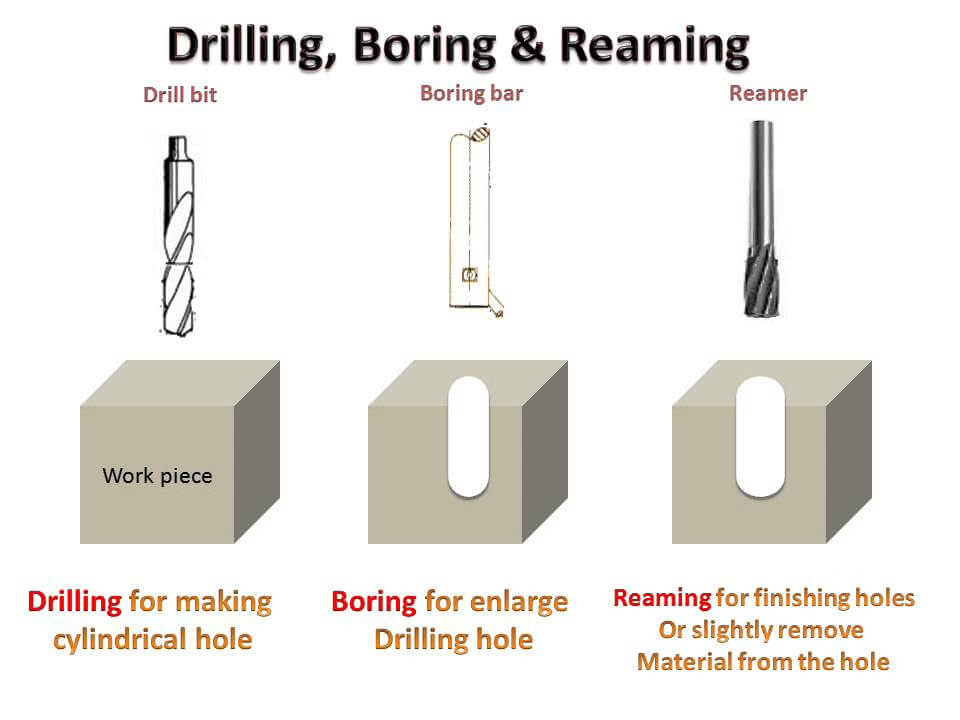 Drilling Vs. Boring Vs. Reamimg
Image Description: Illustration comparing drilling, boring, and reaming operations side by side.
Reaming, boring, and drilling are essential machining operations, each with its specific application and characteristics. Understanding these differences is crucial for selecting the right process for your project. Below is a technical breakdown of their distinctions:
| Factors | Drilling | Boring | Reaming |
| Primary Function | Create a hole of a specific diameter. | Enlarge or refine an existing hole. | Achieve a precise hole size with a smooth finish. |
| Material Removal Rate | High material removal rate, especially for larger holes. | Low material removal rate, as it mainly enlarges holes. | Very low material removal rate; only refines the hole. |
| Hole Tolerance | Low accuracy; typically ±0.1mm and more. | Moderate accuracy; typically ±0.05mm to ±0.1mm. | High accuracy; typically ±0.001mm to ±0.005mm. |
| Surface Finish | Rough surface with visible tool marks. | Smooth surface, but may leave slight tool marks. | Very smooth surface, often requiring a mirror finish. |
| Tool Geometry | Twist or flat drill bit with a pointed or cylindrical cutting edge. | A boring tool, often with an adjustable cutting diameter. | Reamer with multiple cutting edges (flutes) for fine cutting. |
| Applications | Initial hole creation, especially for deep or large holes. | Enlarging holes for precise fitting or aligning components. | Finishing holes for tight tolerances and precise fits. |
When to Choose Reaming over Boring?
- You need a precise hole size: When you need high precision and closed hole dimensions, reaming is ideal.
- The surface finish is critical: When you want a high degree of accuracy and a fine surface, free from marks.
- The hole is already drilled/bored: Reaming is best for refining an existing hole.
- You need minimal material removal: A minimal amount of material is removed, which comes in handy when you need a slight change.
- You’re working with small-diameter holes: Reaming removes only a small amount of material, perfect for slight adjustments.
- You need to ensure a perfect fit: When you need to fit a component such as a bearing, pin, or shaft, reaming is preferred.
Get a Perfect Hole Machining Service with Premium Parts
At Premium Parts, we specialize in delivering precise, high-quality hole machining services tailored to your needs. Whether you need reaming, boring, or drilling, we make sure that every hole meets your exact specifications. Our expert team uses advanced equipment and top-tier tools to achieve tight tolerances and smooth finishes, making sure your components fit and function flawlessly.
Choose Premium Parts for your hole machining needs and experience exceptional quality, accuracy, and attention to detail. Let us help you bring your project to life with perfect, precise holes every time.